It is defined as eco-friendly, centralized coin that can be mined with computers, smart tvs, Arduino, Raspberry Pi and more. Especially we can say any device that can connect to internet.
Website: https://duinocoin.com/
Team includes very young developers. The focus of this coin is energy efficiency. Because you can mine this coin with very small devices.
Robert Piotrowski is the founder of the project. You can reach his Github page from here: https://github.com/revoxhere/
The good thing about this coin is that it has “kolka system” where Arduino gets more rewards compared to graphic cards and other high end computers.

If you know how to upload a program to Arduino, you can easily start mining using the ready .ino file shared.
Althought the DUCO is a centralized coin, you can always wrap it to wDUCO which is a decentralized version of DUCO. So don’t worry about the centralized nature of the DUCO. On the other hand, DUCO’s centralized nature may be in some ways a good feature if you think about speed. You can transfer your DUCOs in seconds.
Another good thing is that you have https://wallet.duinocoin.com/ website. This website will behave like your wallet on the web.
To start mining with your Arduino you can simply use the code listed here: https://github.com/revoxhere/duino-coin under folder “Arduino”.
https://github.com/revoxhere/duino-coin/releases
At this page go to source code;
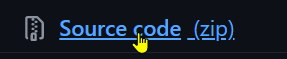
Extract the zip file you downloaded.
There you will see different different options are possible. Just continue with ESP8266 if your device is Wemos D1 as mine. If you will use Arduino, you need to upload the source code under the “Arduino” folder and use AVR Miner to start mining.
For ESP8266 I see the .ino code is there.
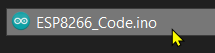
I double click and open with Arduino IDE.
You just need to change this line with your WiFi name;
const char* SSID = "My cool wifi name";
Also here with your WiFi pass so that your Wemos can also connect to your network and also connect to internet to mine.
const char* PASSWORD = "My secret wifi pass";
Enter here your username for the DUCOs to be sent to your account;
const char* USERNAME = "my_cool_username";
Important trick here with clock speed is choosing 160MHz. You need to select from here at the Arduino IDE;

Also need to change this option to “true” at the code;
// Change false to true if using 160 MHz clock mode to not get the first share rejected
const bool USE_HIGHER_DIFF = true;
After that difficulty is increasing but it seems to be finding faster rewards. If you want to get less difficulty then use default settings. If not sure what it means just use default conditions, it will work anyway but slow.
But here problem is that since your Arduino does not have ability to connect to internet, you need to use your PC to interact your Arduino to internet to mine. So if you calculate energy consumption you need to include also the PC energy consumption. With Arduino, you need to also run a program on your PC that connects your Arduino.
On the other hand we advice to use your Arduino with ESP8266 which enables your Arduino to connect internet, or use Wemos D1 boards.
With a Wemos D1 board we tried for a day and could mine 14 ᕲs. We also measured the energy consumed by the board using a smart energy meter. The energy consumed by the Wemos D1 is 0,02kWh. From these values you can calculate how much you will earn by day and month. You can decide on if it is good for you or not.